
Lighting
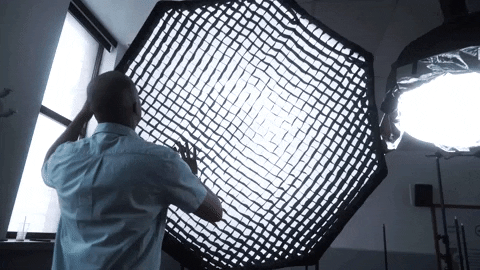
One of the ways we add value to a video production is with control of the lighting. Lighting is one of most significant ways we can change the mood and quality of the video image. Let’s look at some basic lighting techniques and see how you can achieve them without needing a full production lighting kit.
Settings
We touched on Exposure briefly in the Camera Settings section of this guide. Normally your camera will automatically and successfully try to determine the correct exposure. If the camera is confused by something like a bright background or shadows it may result in an over or under exposed shot. You can manually adjust the exposure by tapping the screen, then use sliding brightness guide.
Colour Balance (to the light in your location) – note that different light sources have different colour renditions on camera. Indoor or artificial light is predominantly orange, while daylight is blue for most of the daylight hours. Again, your camera phone will automatically adjust or “white balance” the light. Difficult or mixed lighting situations may confuse the camera at times. Healthy skin tones and white objects in the frame are good indicators of a correct Colour Balance. If you are not happy with the colour of the shot, try a different angle or location until you find a pleasing result. This can also be adjusted in post-production with most editing software.
Light Sources
Stable Light Sources – Some light sources may flicker on camera (e.g. fluorescent, LED, mercury vapour). This is rare but always analyze the screen carefully. If you see flickering you can turn off those light sources or change your angle or location.
Even Lighting – Lighting situations with less contrast are always preferable. Avoid situations that have bright backgrounds and dark shadows unless you are going for that effect or style. Cloudy days can be helpful in achieving a well lit subject for your exterior shots. On sunny days finding a shaded area with few bright spots can create a more pleasing result. When shooting people or other subject matter inside try using available lighting.

Turn all lights on if needed or turn some off. Experiment to determine what looks best.
Get the subject close to a light source or move the light closer the subject. Placing a person beside a window utilizes a great natural light source. Just angle the person to a position where you like how the light illuminates the face.
Backlight can be a blessing and a curse. A little backlight can separate your subject from the background by wrapping the shoulders in a rim of light giving your scene depth and defining the space.
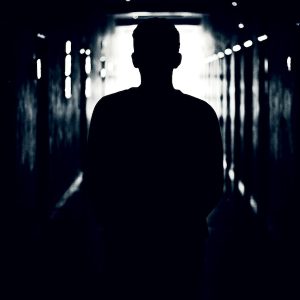
On the other hand, too much backlight will confuse your camera and cause your subject to plunge into darkness as a silhouette as your camera struggles to expose for the bright light source.
This may be a great look for a dynamic scene, but rarely useful as a lighting scenario for an interview unless you’re working with a secret witness. Keep a close eye on the monitor to determine how to use the available backlight in your scene.
Bouncing light using a reflector can often reduce harsh shadows on one side of your subjects face. Use a large white sheet of poster board as a makeshift reflector. Position the poster board opposite from your light source whether it be a light or a window. Bounce the light back up into the shadows caused by the light source to balance the light and dark areas on your subject.
